 FixPix Quick Help
FixPix Quick Help
FixPix Quick Help

Hi and welcome to FixPix Home.
This documentation was written in the hope that no one will need to read it, but until perfection is achieved, here it is...
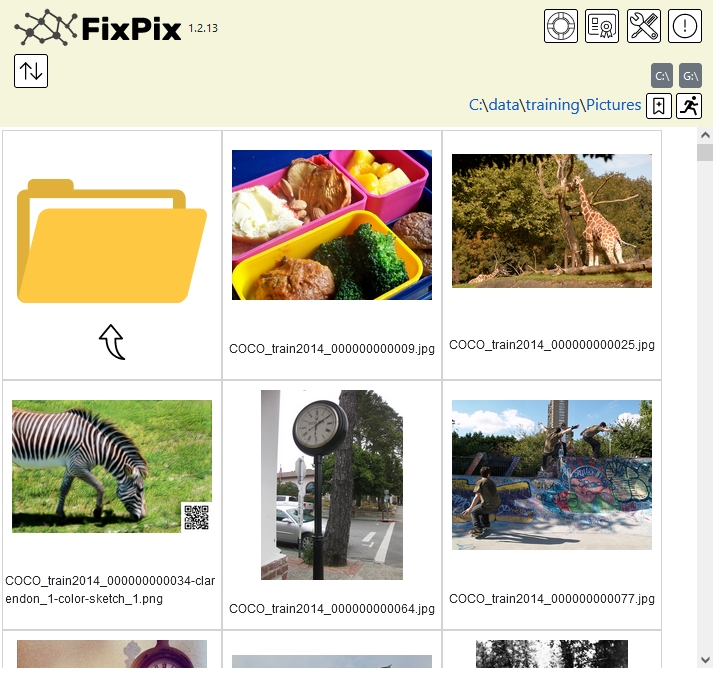
When you launch FixPix, you'll be able to browse your disk for images to process. For example, if you run on Windows, your first screen could look something like this:
 ) to navigate to a specific folder.
 )
)
 ), clicking on the 'data' part will navigate to the C:\data diredctory.
 button will navigate to the D: drive.
👉 Note that FixPix will remember the directory you are in for each different drive on your disk.
On the top right you can see 4 icons:

|
Clicking this is how you get to this help window. Click it whenever you want to open it again. |

|
Clicking this opens the license window.
Once you purchase a license you will immediately receive a license code which you enter by clicking this button and pasting it in the registration button, as shown below: 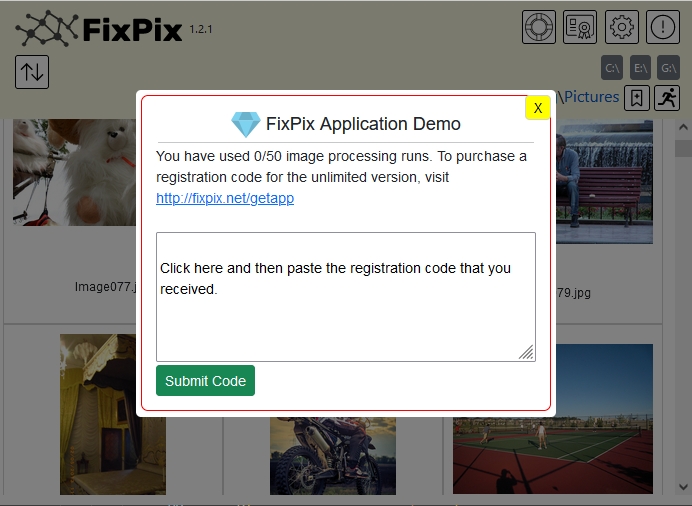
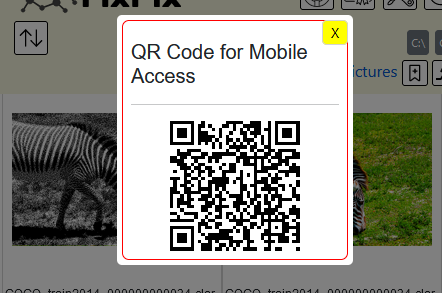
The Demo version of Fixpix Home is limited to processing 50 images and also adds a small QR code on the bottom right part of the generated image. If you've purchased a license for the full version of Fixpix Home the application will become fully functional and your name will appear in the license window. |

|
Clicking this opens up the settings menu from which you can change preferences and view additional options. |

|
Clicking this opens up the recent errors window. You should rarely see errors, but if there are issues of insufficient memory, corrupt images, network problems etc. They will be displayed here. |
| Note 👉 |
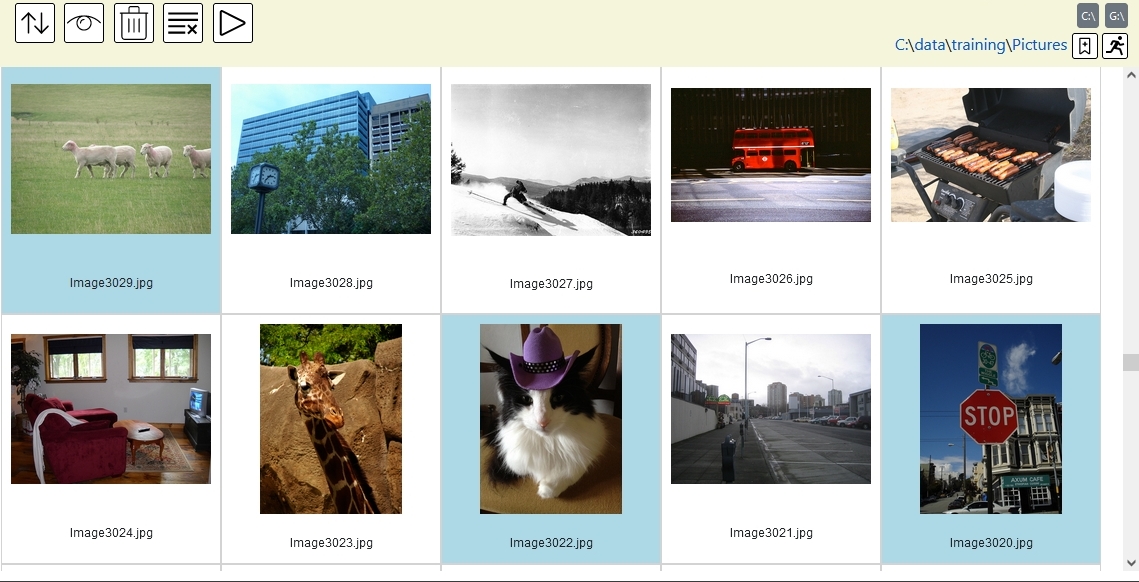
To switch to Single Selection Mode:
|
 button. This will open a dialog window from which you can zoom in and inspect every selected image.
 button. This will open a dialog window to confirm deleting the files.
| Note 👉 | All dialog windows can also be dismissed by clicking the darker area around the dialog window or by pressing the Esc key on the keyboard |
 )
as can be seen in the example below:
)
as can be seen in the example below:

You can also simulateously zoom in and out of both images using the mouse wheel as well as simultaneously pan both images by dragging them with the mouse pointer.
| Note 👉 | The image on the left of the comparison window will always be the image that was clicked first when selecting the files to compare |
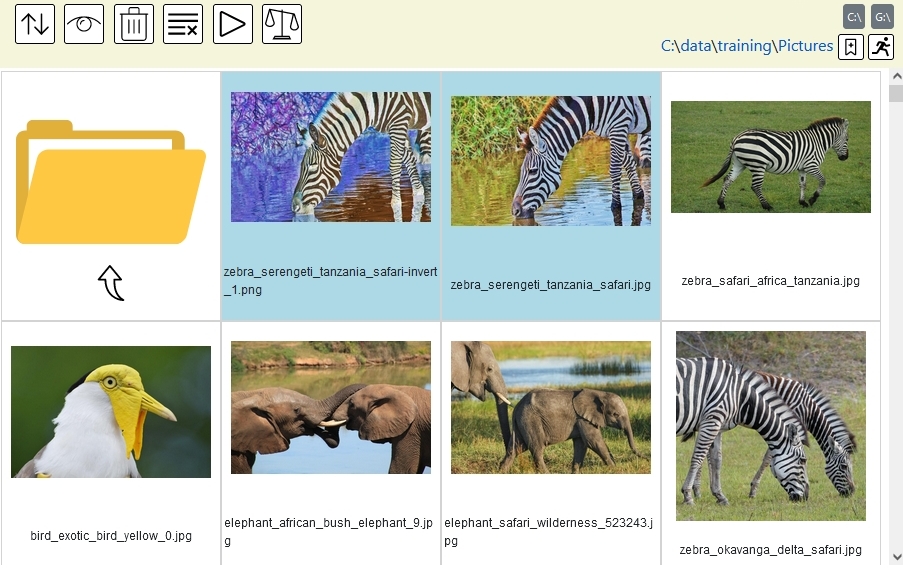
 ) in the toolbar.The image processing window will appear with the list of function categories you can perform on the files you have selected:
 button to view the available processing options for the 'Basic Functions' plugin.
In the window the opens, you can see the various effects you can perform on the images you have selected to process.
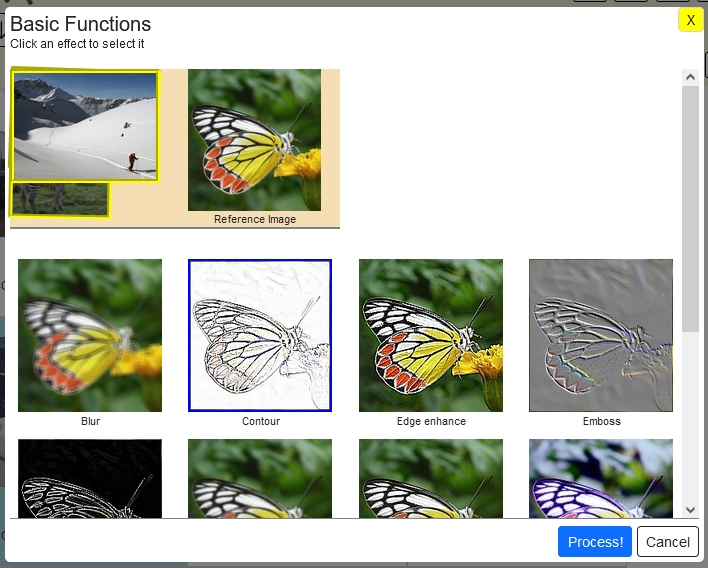
Click the effect you want to implement on the images you selected (you can tell it is selected by the blue frame) and then click the  button
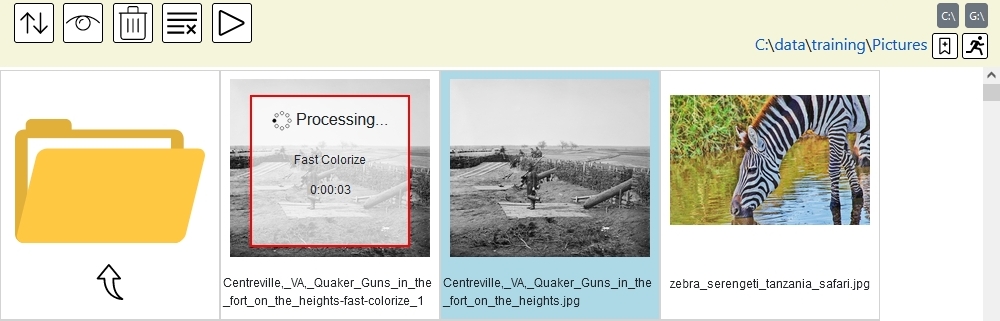
The image processing for the files you've selected will start and unless the processing is very short, you'll see the elapsed processing time for each image that is being processed.
| Note 👉 | Processing time for each image will depend on many factors, such as the type of process being selected and the size of the image, therefore the time it takes to process an image can vary between a few seconds to even a few minutes (especially when running heavy duty AI processing on a large image or slow processing hardware) |
Admittedly, the initial set of image features that are bundled with FixPix are available in any simple image processing sofware. What makes FixPix different is it's ability to import additional plugins, each of which can contain one ore more sophisticated image processing features (such as those that utilize deep neural networks).
The additional FixPix plugins with the more sophisticated features are readily available for installation from within FixPix. The reason they are not pre-installed is that they make use of large deep neural network models and would make the FixPix application size to large for a typical installation. Making them separately downloadable also gives you freedom to choose which feature you wish to install.
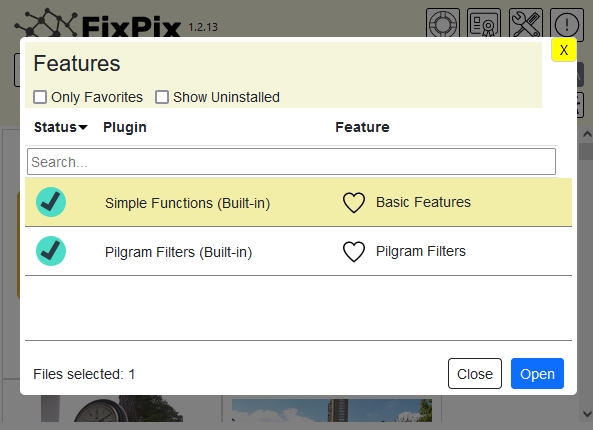
To see the list of additionaly available FixPix plugins (i.e, those with the cooler features...) first open the features window (by selecting a file to process and clicking the
icon in the toolbar.

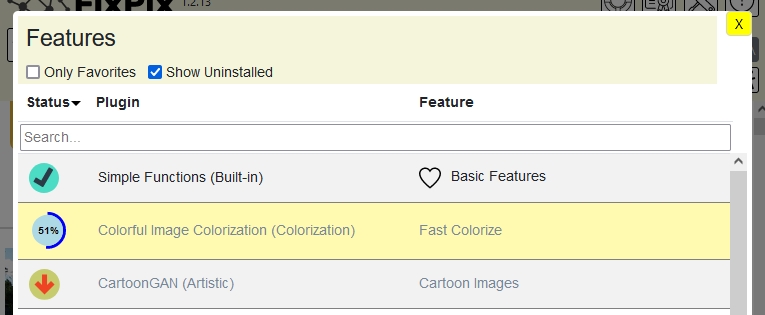
 button will appear which will enable you to install the plugin with all the features it includes to your set of installed plugins (in this example "Colorful Image Colorization" has only one feature).
| Notes 👉 |
|
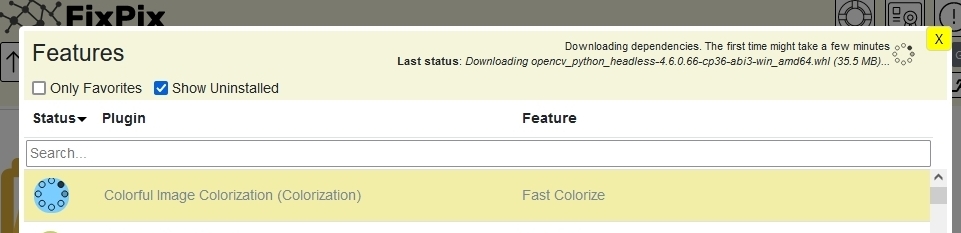
button to start installing it. You will then see an indication that your plugin is being downloaded for installation:
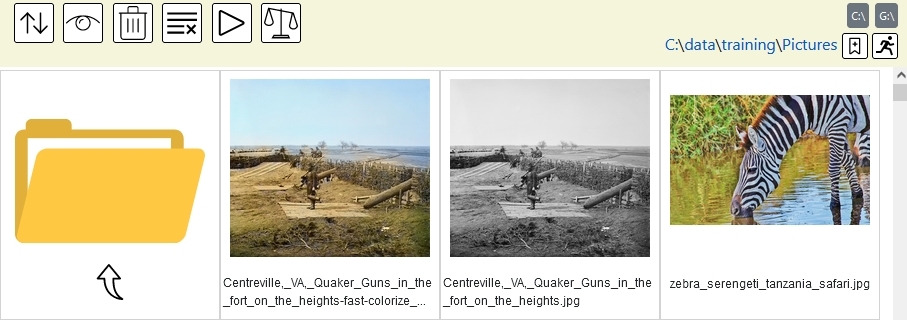
We now have the colorization plugin installed. If we selected a black and white photo, clicking the process button will start the conversion:
and after just a few seconds, the process will complete:
To save navigation time, you can bookmark your favorite directories and then quickly jump to them to process your images.
Adding a directory to your favorites
Bookmarking a directory is done simply by clicking the bookmark button (
 on the top right) when you are viewing the contents of that directory.
A window will appear for you to give a name to this bookmark (with a suggested default name):
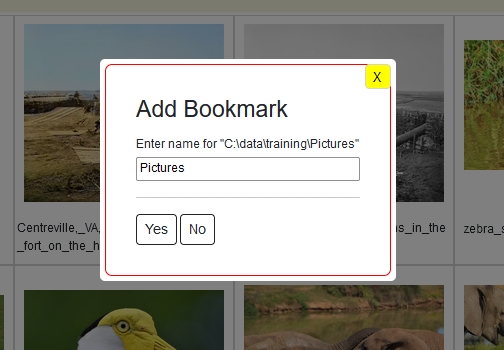
Once you click the 'Yes' button, the directory will be added to your bookmarks
Jumping to a bookmarked directory
To quickly navigate to one of your bookmarked directories, first open the list of bookmarked directories by clicking the "Go to bookmark" button (
 on the top right). A list of all your current directory bookmarks will appear:
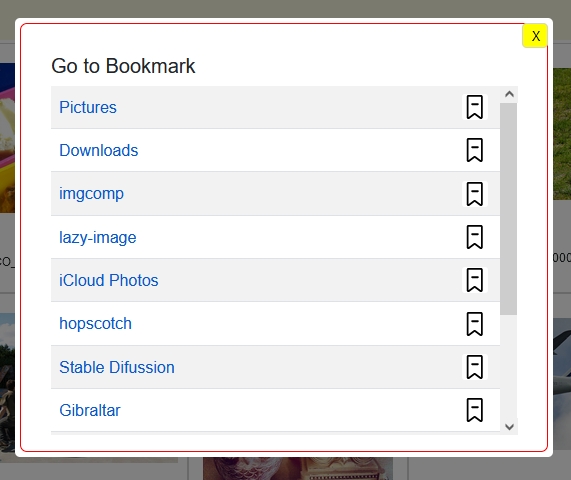
Simply click on the name of the bookmark you wish to jump to and you'll instantly be transported to that directory.
If you wish to delete a bookmark for a directory, just click the
 icon to the right of the bookmark name.
Similar to how having a list favorite directories that you can quickly navigate to is helpful, when the list of installed plug-ins gets longer, it also helps having a list of favorite image processing plugins and functions.
Adding a feature from the favorites list
To add a feature to your list of favorite functions, click the heart to the right of the function name and it will turn into a red heart to indicate that it has been added to your favorite features:
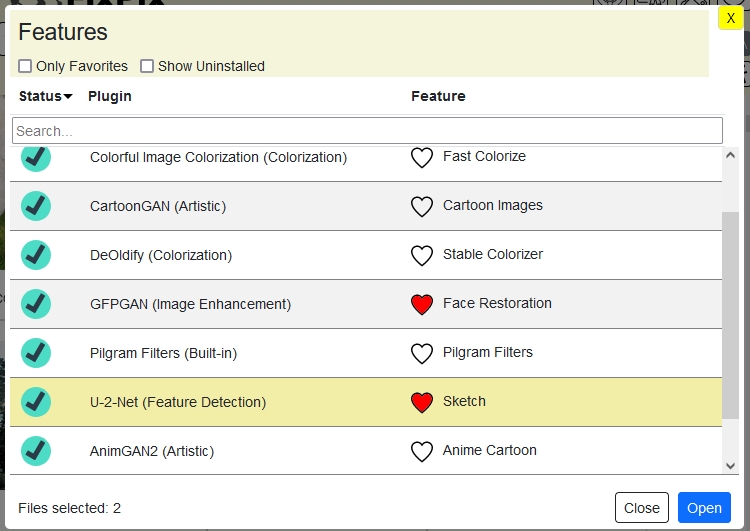
Removing a feature from the favorites list
To remove a function from the list of favorites, just click the red heart and it will turn back to a heart outline and will not be included in the list of favorite functions.
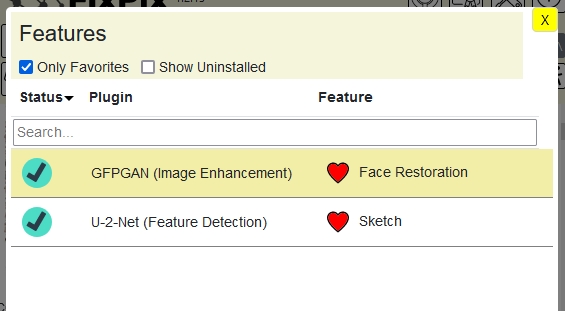
Listing only the favorite features
Once added to the favorite functions you can view only your favorite functions and filter out all the other functions by clicking the "Only Favorites" checkbox as shown below.
If you wish to perform an operation on just one file, Fixpix also supports using context menu operations by right clicking (Ctrl + Click on a Mac) the image you wish to perform the action on.
After right-clicking the image, a menu of possible operations on the image wil appear, as follows:
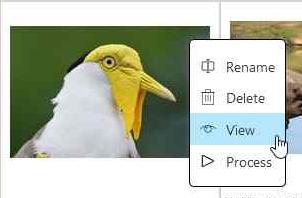
You can then select any of the operations from the menu to perform on the image:
Open source has revolutionized the software development scene. This software makes use of open source code which was contributed by talented and generous developers and companies. Whether it is small functions or large projects, I'd like to convey my gratitude and credit them here:
 item.
A window with a QR code similar to the one below should appear:
item.
A window with a QR code similar to the one below should appear:
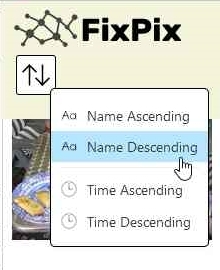
 button will bring up the sort file menu:
 item ).